
Connections
Keeping In Touch and Up to Date with Your Panelist Connections
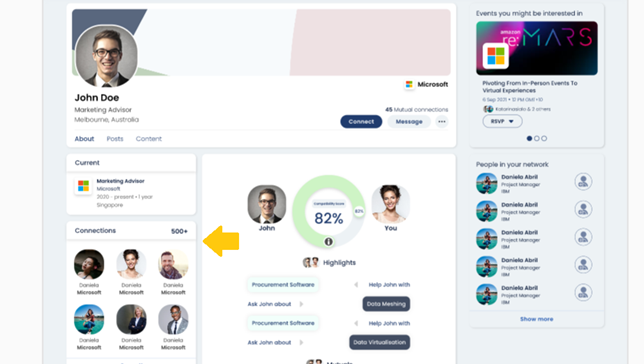
It's easy to collaborate and keep in touch with your contacts on Panelist. From your profile screen, you'll find the 'Connections' tab to the bottom left column, below where your 'Past experience' information sits.
Click on 'See all' to view your list of connections on Panelist.
Click on 'See all' to view your list of connections on Panelist.
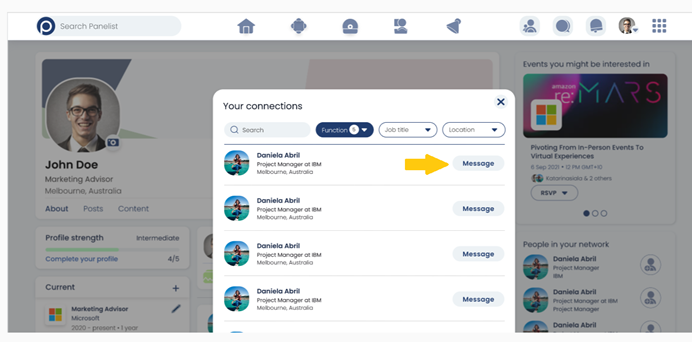
This takes you to the search screen, with the 'Connections' filter selected on the left sidebar, and the 'People' tab selected in your search categories toolbar in the top middle section.
This is the same search screen that you would otherwise be using to search for other Panelist users who you aren't currently connected to. Except that with the 'Connections' filter on and 'People' tab selected, you'll be able to use Panelist's search function to pull up individual profiles from among your connections only.
This is the same search screen that you would otherwise be using to search for other Panelist users who you aren't currently connected to. Except that with the 'Connections' filter on and 'People' tab selected, you'll be able to use Panelist's search function to pull up individual profiles from among your connections only.

You can also add to this search, by selecting other filters like what job title, or company to search for. These are found in the same left hand sidebar where the 'Connections' filter is located.
Messaging
Communicating via Panelist's Messaging Function
Panelist's messaging feature lets users contact each other, even if they aren’t already in each other's connections list. Our messaging feature lets you keep things as casual, or as business-focused as you’d like. Whether you’re keen to pitch an idea to someone, or collaborate with others on shared interests, Panelist’s messaging feature lets you do this, for free.
Sending a Message On Panelist
You can send someone a message by clicking on the ‘Message’ button, on their profile page. This launches the messaging tab, found near the bottom right corner of your screen while on Panelist. Panelist’s messaging feature lets you use emojis to keep chats lively, and even allows for documents to be uploaded and sent directly to someone you're chatting with.
You can close the messaging tab just like any other window, or minimize it by clicking at the top of the window once you’re done with your conversation.
You can close the messaging tab just like any other window, or minimize it by clicking at the top of the window once you’re done with your conversation.
Accessing All Your Messages
To view all your conversations, bring up the Messages bar in the bottom right corner of your screen, or click on the ‘Messages’ tab on your top toolbar. Clicking ‘see all’ will take you to the Panelist message window, where all your conversations are located.
Remember to be as detailed and engaging as possible when describing your company profile. When filling in your company information, remember that it helps to consider how you could provide others an insight as to how your company aligns with their professional agendas on Panelist.

Click the Panelist logo at the top left of the messages screen at any time, to return to your Panelist home screen.
Panelist Events
Joining and Registering for Panelist Events
Clicking on event listings takes you to an event page, where all its details can be found. Event pages let you interact with the event listing, as well as with other users who are attending, or have shown interest in the event.
To attend an event, you’ll need to click the ‘Join’ button, and complete your registration details. Doing this adds the event to your calendar, so you’ll be able to receive notifications and updates by the organizers.
You can share events that you're interested in with those in your connections list. Just click the ‘Invite connections’ button on the event page, to reveal a drop down menu that lets you choose your preferred method of sharing the event with others.
Send an invite as a direct message to a contact, share it on your profile page, or copy and paste a link to the page in an email, or chat box. Additionally, you can also click the arrow button next to ‘Invite connections’ on the page – with so many ways to share, there's no reason why you shouldn't be talking about the events you're most looking forward to attending.
Create and Host Your Own Events on Panelist
You can also create and host your own events on Panelist. Simply click on the ‘Events’ tab on your top page toolbar, which will take you to the Events page. To the left of this page, you’ll see the ‘Create an event’ button, colored in yellow.
Clicking this button takes you to the Create Event page, which lets you describe and customize your event for others to see. It’s important to provide as much information as possible for your event, so others will have all the information they need to decide to attend it, and share it with others in their network.
Clicking this button takes you to the Create Event page, which lets you describe and customize your event for others to see. It’s important to provide as much information as possible for your event, so others will have all the information they need to decide to attend it, and share it with others in their network.

Once you’ve filled out your event summary page, you’ll be able to explore several other functions within the Event Manager screen.
